Complete Ergonomic Desk Setup Guide 2026: 7-Step Checklist
Step-by-step ergonomic desk setup: chair height, desk height, keyboard angle, monitor position, mouse placement, foot support, and break schedule. Sitting + standing configurations included.
Complete Ergonomic Desk Setup Guide 2026: 7-Step Checklist
Most “ergonomic desk setup” guides show you a pretty picture and call it done. Real ergonomics is not a static photo — it is a repeatable process that accounts for your body dimensions, your equipment, your tasks, and your movement patterns throughout the day.
This guide gives you a 7-step checklist you can execute in one afternoon. Each step has a measurable target, a verification test, and a troubleshooting note. Do them in order. Skipping steps breaks the chain.
The 7 Steps — In Order
| Step | Target | Time | Verification |
|---|---|---|---|
| 1. Chair Height | Feet flat, thighs parallel, 90° knees | 5 min | Fist fits under thigh at seat edge |
| 2. Desk Height | Elbows 90° at keyboard home row | 5 min | Forearms parallel to floor |
| 3. Keyboard Angle | 15° negative tilt (front higher) | 2 min | Wrists straight, not bent up/down |
| 4. Monitor Position | Top 1/3 at eye level, arm’s length | 5 min | Gaze lands on top 1/3 with eyes closed→open |
| 5. Mouse Placement | Same level as keyboard, minimal reach | 2 min | Elbow stays at side, shoulder relaxed |
| 6. Foot Support | 90° ankles if feet don’t reach floor | 2 min | Rocker motion available, non-slip |
| 7. Break Schedule | Microbreaks + macrobreaks + movement | Ongoing | Timer set, compliance tracked |
Total setup time: ~25 minutes. Re-verify monthly or when equipment changes.
Step 1: Chair Height — The Foundation Everything Else Sits On
Target: Feet flat on floor (or footrest), thighs parallel to floor, 90° at knees, 2–3 fingers’ width between seat edge and back of knees.
Why it matters: Chair height determines pelvic position. Too high → feet dangle → posterior pelvic tilt → lumbar flexion → chain reaction up to wrists. Too low → hips below knees → anterior pelvic tilt → lumbar hyperextension → thoracic rounding → forward head.
How to set it:
- Stand in front of chair. Adjust seat height so top of seat is just below your kneecap.
- Sit. Feet flat. Check thigh parallel.
- Slide back until lower back contacts lumbar support.
- Verify: you can slide a fist under your thigh at the seat edge. If not, seat is too deep → adjust seat pan forward or add lumbar cushion.
Common mistakes:
- Sitting on the edge of the seat (no back support) → lumbar fatigue in 20 minutes
- Chair too high for desk → shoulders shrug → trapezius tension → wrist extension compensation
- No lumbar support → slouching → the rest of the chain fails
If your chair doesn’t adjust low enough: Use a footrest (Step 6) to bring the floor up to you.
Step 2: Desk Height — Elbows at 90°
Target: With shoulders relaxed and elbows at your sides, forearms parallel to floor (90° elbows) when fingers rest on keyboard home row.
Why it matters: Desk height sets the vertical relationship between your shoulders and your hands. Too high → shoulder elevation → trapezius/levator scapulae overwork → tension headaches, neck pain. Too low → wrist extension or shoulder protraction.
How to set it:
- Sit in your properly-adjusted chair (Step 1 complete).
- Relax shoulders. Bend elbows 90°. Hands float naturally.
- Measure from floor to bottom of elbow. This is your target desk height.
- Adjust desk (or keyboard tray) to this height.
Standing desk note: Repeat this process standing. Standing elbow height is typically 1–2” higher than sitting. Save both as presets if electric.
No adjustable desk? Use a keyboard tray (negative tilt preferred) or raise/lower chair + footrest combo. The elbow-90° rule is non-negotiable.
Step 3: Keyboard Angle — 15° Negative Tilt
Target: Keyboard front edge 15° higher than rear edge. Wrists straight (neutral) — not bent up (extension) or down (flexion). Forearm-wrist-hand forms a straight line.
Why it matters: This is the single highest-impact variable for wrist health. A flat keyboard forces ~15–20° wrist extension. At 20° extension, carpal tunnel pressure doubles. At 30°, it quadruples. A 15° negative tilt neutralizes this.
How to set it:
- Place keyboard on desk at your measured home-row position (4–6” from desk edge).
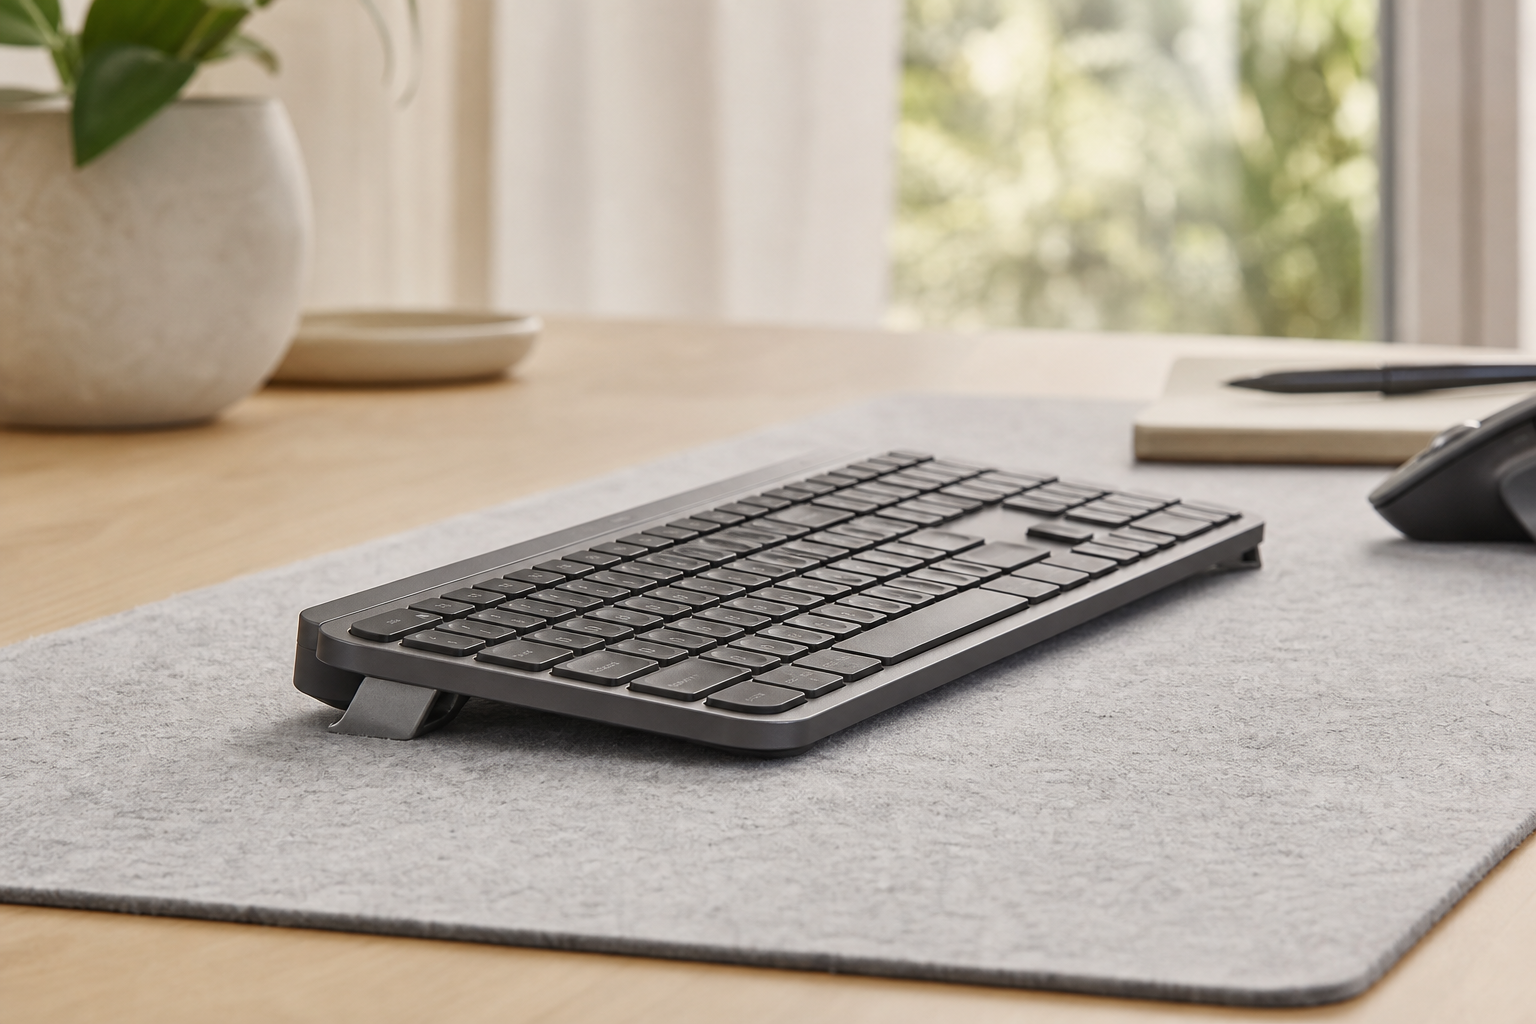
- Apply 15° riser (KeyRiser for Logitech MX Keys/MX Keys S/MX Keys Mini).
- Type a paragraph. Check wrists: straight line from forearm through hand?
- If wrists bend up → increase angle or lower desk. If wrists bend down → decrease angle or raise desk.
KeyRiser advantage: Fixed 15° angle, anti-slip base, no adjustment drift. Works identically at sitting and standing heights because the angle is fixed relative to the keyboard, not the desk.
Verification test: Place a ruler along your forearm and hand. It should touch both without gaps. If light shows under wrist → extension. If ruler rocks on knuckles → flexion.
Step 4: Monitor Position — Eye Level + Arm’s Length
Target: Top of screen at or slightly below eye level. Distance: arm’s length (20–24”). Tilt: 10–20° back (top farther than bottom).
Why it matters: Monitor position drives head position. Every inch of forward head posture adds 10 lbs of effective load on the cervical spine. A monitor too low → chin tuck → cervical flexion → thoracic rounding → shoulder protraction → wrist extension.
How to set it (seated):
- Sit in final chair position (Step 1).
- Extend arm horizontally. Fingertips should touch screen (or be 1–2” away).
- Raise/lower monitor until top bezel aligns with eye level.
- Tilt monitor back 10–20°.
How to set it (standing):
- Stand at desk in final standing position.
- Repeat: arm’s length, top 1/3 at eye level.
- Critical: Monitor must move independently of keyboard. This is why a monitor arm (Step 2 upgrade) is essential — fixed monitors cannot satisfy both positions.
Dual monitor setup:
- Primary: centered on body midline
- Secondary: 15–30° inward angle, same height, same distance
- Both on arms for independent adjustment
Laptop users: External keyboard + mouse + laptop stand (screen at eye level) OR external monitor + laptop closed. Never use laptop keyboard + trackpad as primary for >2 hours.
Step 5: Mouse Placement — Same Plane, Minimal Reach
Target: Mouse surface at exact same height as keyboard. Mouse close enough that elbow stays at side (upper arm vertical). Shoulder relaxed, not elevated or abducted.
Why it matters: Reaching for a mouse that is too far, too high, or too low forces shoulder abduction/elevation → trapezius overload → referred pain to neck, wrist, and even elbow (mouse shoulder).
How to set it:
- Place mouse pad touching keyboard’s right edge (or left for lefties).
- Mouse center should be no farther than 6–8” from keyboard center.
- Elbow at side, forearm rotated ~30° inward (neutral pronation).
- If using vertical mouse: same position, forearm rotated to handshake angle.
Common errors:
- Mouse on different surface height (keyboard tray vs. desk) → constant wrist angle shift
- Mouse too far right → chronic shoulder abduction
- Mouse pad too small → picking up mouse to reposition → micro-trauma
Pro tip: Use a large desk mat (Corsair MM300 PRO or Logitech Desk Mat) that extends under both keyboard and mouse. Single surface = consistent height = consistent wrist angle.
Step 6: Foot Support — The Forgotten Foundation
Target: If feet don’t rest flat on floor with 90° ankles at your final chair height, add adjustable footrest. Ankles 90°, feet fully supported, rocker motion available.
Why it matters: Unsupported feet → posterior pelvic tilt → lumbar flexion → the entire upstream chain collapses. A footrest is not a comfort accessory — it is a postural requirement for anyone whose feet don’t reach the floor at proper desk height.
How to set it:
- After Steps 1–2 complete, check feet.
- If heels lift or toes point down → add footrest.
- Adjust height until ankles hit 90° with thighs still parallel.
- Use rocker motion throughout the day (promotes venous return, reduces static load).
Top pick: Mount-It! Adjustable Footrest — 6 heights (3.5”–7.5”), textured non-slip, rocker base. ComfiLife Memory-Foam Footrest — softer option, 3 heights, memory foam top.
Standing note: Footrest not needed when standing (floor supports feet). But anti-fatigue mat becomes the equivalent — cushions joints, encourages micro-movement.
Step 7: Break Schedule — The Variable That Makes It All Work
Target: Structured microbreaks, macrobreaks, and movement breaks. No static posture > 60 minutes.
Why it matters: No ergonomic setup survives static loading. Even perfect posture held for 4 hours creates tissue creep, reduced blood flow, and metabolic waste accumulation. Breaks reset the system.
The 3-tier break system:
| Break Type | Frequency | Duration | Activity |
|---|---|---|---|
| Microbreak | Every 20 min | 20–30 sec | Look 20 ft away (20-20-20 rule), drop shoulders, wiggle fingers |
| Macrobreak | Every 60 min | 5–10 min | Stand, walk, stretch, hydrate, look out window |
| Movement Break | Every 2–3 hrs | 15–30 min | Walk outside, stairs, bodyweight exercises, change location |
Implementation:
- Set timer (phone, computer, Pomodoro app)
- 20-20-20: every 20 min, look 20 ft away for 20 sec
- Hourly: stand, stretch arms overhead, open chest, walk 100 steps
- 3-hour: 15-min walk outside (circadian + vitamin D + movement)
Sit-stand integration: If you have a converter (Step 5 upgrade), alternate sit/stand every 30–60 min. This counts as a macrobreak. But you still need microbreaks (20-20-20) and movement breaks.
Sitting vs. Standing Configurations
Sitting Configuration (Baseline)
Chair → Footrest (if needed) → Desk (elbow 90°) → Keyboard (15° riser) → Mouse (same level)
                                                                       ↓
Monitor Arm → Monitor (eye level, arm's length, 15° tilt back)
Standing Configuration (Additive)
Anti-fatigue mat → Desk raised (elbow 90° standing) → Keyboard (same 15° riser) → Mouse (same level)
                                                                          ↓
Monitor Arm → Monitor raised (eye level standing, same distance, same tilt)
Key principle: Keyboard angle (15°) and mouse height relative to keyboard do not change between sitting and standing. Only desk height and monitor height change. This is why a fixed-angle riser (KeyRiser) and monitor arm are essential — they decouple keyboard angle from desk height.
30-Day Implementation Plan
Week 1: Foundation (Steps 1–3)
- Day 1–2: Chair + desk height. Lock it in.
- Day 3–4: Keyboard riser. Type 2 hrs/day. Log wrist comfort (1–10 scale).
- Day 5–7: Add monitor position. Verify eye level both sit/stand.
Week 2: Pointing & Support (Steps 4–6)
- Day 8–10: Vertical mouse adaptation (30 min → 60 min → 90 min).
- Day 11–12: Footrest. Dial height. Rock throughout day.
- Day 13–14: Full sitting configuration audit. Photo document.
Week 3: Standing Integration (If applicable)
- Day 15–17: Standing desk/converter. Set presets.
- Day 18–21: Alternate 15 min stand / 45 min sit. Monitor comfort.
Week 4: Optimization
- Day 22–25: Fine-tune all heights. 20-20-20 timer active.
- Day 26–28: Movement breaks scheduled. Walk tracking.
- Day 29–30: Final audit. Compare Day 1 vs Day 30 wrist/neck/shoulder scores.
Budget Tiers: Build What You Can Afford
| Tier | Includes | Est. Cost | Best For |
|---|---|---|---|
| Essential ($13–50) | Keyboard riser + footrest (if needed) | $13–50 | Budget-constrained, mostly sitting |
| Core ($100–250) | Essential + monitor arm + vertical mouse | $100–250 | Daily computer users, wrist/neck issues |
| Complete ($300–500) | Core + sit-stand converter + anti-fatigue mat | $300–500 | High-volume users, existing pain, prevention-focused |
| Premium ($800+) | Complete + electric standing desk + premium chair | $800+ | Full renovation, corporate budgets |
Start at Essential. Upgrade when you feel the limit. Do not buy Premium hoping it solves problems Core would have fixed.
Troubleshooting Quick Reference
| Symptom | Likely Cause | Fix |
|---|---|---|
| Wrist pain typing | Keyboard flat/positive tilt | Add 15° riser (KeyRiser) |
| Neck pain | Monitor too low | Raise monitor to eye level (arm) |
| Shoulder pain | Mouse too far/high | Move mouse adjacent to keyboard, same level |
| Low back pain | Feet dangling / chair too high | Footrest or lower chair |
| Eye strain | Monitor too close/bright | Arm’s length, bias lighting, 20-20-20 |
| Forearm pain mousing | Traditional mouse pronation | Switch to vertical mouse |
| Standing fatigue >30 min | No anti-fatigue mat / shoes | Add mat, wear supportive shoes |
| Numb fingers | Wrist extension + shoulder elevation | Riser + mouse position + chair height |
FAQ
How do I measure my ideal desk height without an adjustable desk?
Sit in chair (Step 1). Relax shoulders, elbows 90°. Measure floor to bottom of elbow. That is your keyboard height. If desk is fixed, use keyboard tray or raise chair + footrest to hit this number.
Can I use books/boxes as a monitor riser?
Temporarily, yes. But they are unstable, non-adjustable, and cannot accommodate sit-stand transitions. A $80 monitor arm pays for itself in 3 months of prevented neck pain.
What if I use a laptop as my only computer?
External keyboard + mouse + laptop stand (screen at eye level) is the minimum viable ergonomic setup. Do not use built-in keyboard/trackpad for >2 hours/day.
Do I really need a vertical mouse if I don’t have pain?
Prevention > treatment. Vertical mouse reduces pronation strain by 23–31% (research). At $60–80, it is the cheapest insurance against future RSI. Adapt over 2–4 weeks.
How often should I re-check my setup?
Monthly for the first 3 months. Then quarterly. Also re-check after: new chair, new desk, new keyboard, new monitor, injury, pregnancy, weight change >10 lbs.
What about keyboard trays?
Negative-tilt keyboard trays (front edge higher) work well. They combine Steps 2 + 3. Ensure tray is wide enough for keyboard + mouse on same surface. Avoid trays that force mouse to a different level.
Final Checklist — Print This
[ ] Chair: feet flat, thighs parallel, 90° knees, lumbar supported
[ ] Desk: elbows 90° at home row (sit + stand presets saved)
[ ] Keyboard: 15° negative tilt, wrists straight (KeyRiser installed)
[ ] Monitor: top 1/3 at eye level, arm's length, 15° tilt back (on arm)
[ ] Mouse: same height as keyboard, elbow at side, vertical mouse adapted
[ ] Feet: flat on floor OR footrest at 90° ankles, rocker active
[ ] Breaks: 20-20-20 timer running, hourly macrobreak, 3-hr movement break
[ ] Sit/Stand: 30–60 min alternation, keyboard angle unchanged
[ ] Documented: photo of setup, measurements saved, comfort log started
All 9 checked? You are ergonomically configured. Now do the work, and let the setup disappear into the background where it belongs.
Recommended Reading
Ready for a Better Typing Angle?
Check KeyRiser on Amazon and confirm compatibility with your MX Keys model.
Buy Now - $9.99