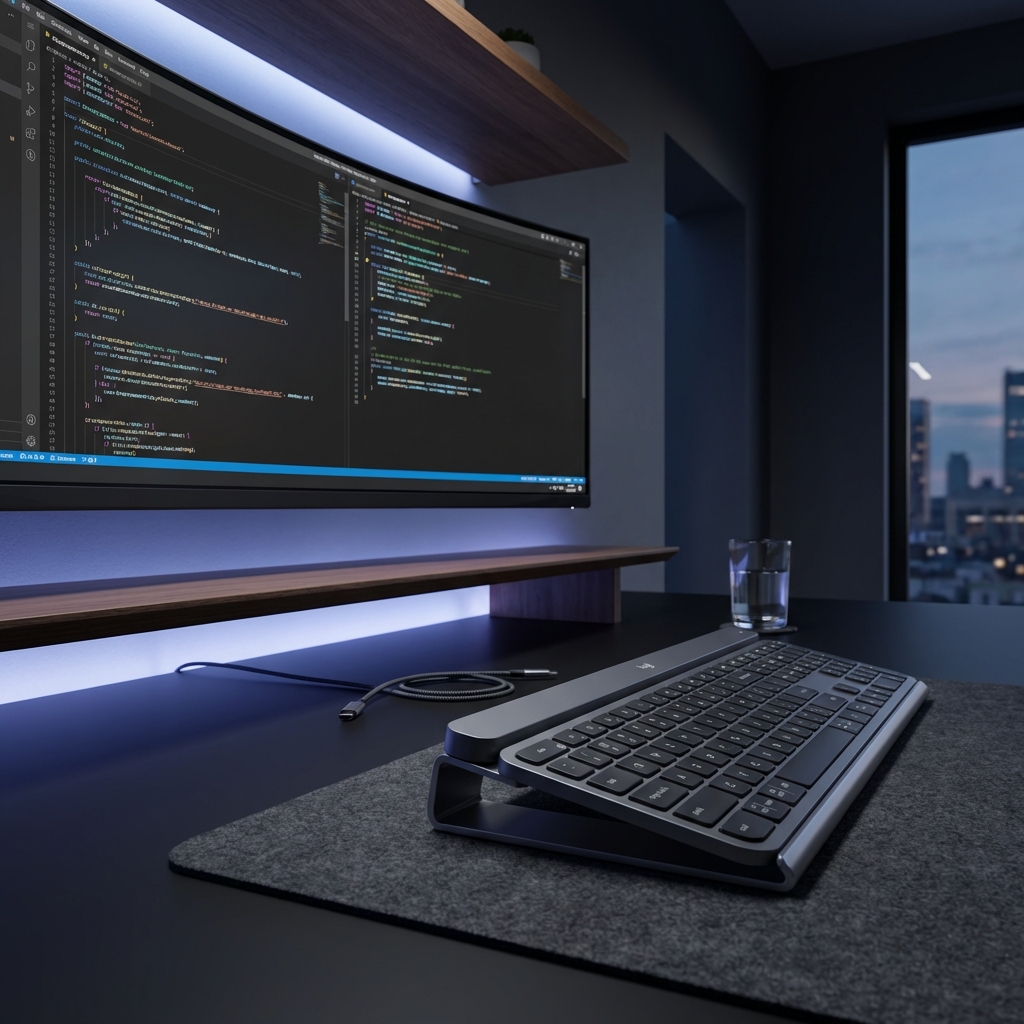
Logitech MX Keys Ergonomic Setup: Better Typing Angle
Complete Logitech MX Keys ergonomic setup guide optimizes keyboard position and tilt angle to improve typing comfort completely. Step-by-step instructions.
Logitech MX Keys Ergonomic Setup: Complete Guide to Pain-Free Typing
The Logitech MX Keys is one of the best keyboards on the market—but out of the box, it’s missing one crucial ergonomic element. Let’s fix that and create the perfect pain-free typing setup.
Why Logitech MX Keys Users Experience Wrist Pain
The MX Keys is brilliant in almost every way:
- ✅ Perfect key travel and spacing
- ✅ Excellent build quality
- ✅ Smart backlight
- ✅ Multi-device connectivity
- ✅ Comfortable key caps
But there’s one major flaw: It sits completely flat on your desk.
The Flat Keyboard Problem
When your MX Keys lies flat:
- Your wrists bend upward (extension)
- Pressure builds on the median nerve
- Blood flow to your hands decreases
- Muscle fatigue sets in quickly
- Long-term damage accumulates
This is why even premium keyboards like the MX Keys can cause pain—it’s not about the keyboard quality, it’s about the angle.
The Optimal MX Keys Ergonomic Setup
Step 1: Add Proper Elevation
This is the single most important change you can make. Research from ergonomics labs worldwide consistently shows that elevating the front of your keyboard is optimal for:
- Neutral wrist position
- Maximum comfort during extended typing
- Reduced strain on tendons and nerves
- Improved blood circulation
How to achieve this:
- Use a precision-engineered stand designed for MX Keys
- Ensure stable, non-slip positioning
- Verify the angle is correct (too steep or too shallow reduces benefits)
Step 2: Position Your MX Keys Correctly
Horizontal placement:
- Center of keyboard aligned with center of monitor
- Spacebar centered with your body
- Enough desk space for natural arm position
Height considerations:
- Top of keyboard at or slightly below elbow height
- Shoulders relaxed, not raised
- Arms at approximately 90° angle
Step 3: Optimize Your Desk Layout
The MX Keys doesn’t work in isolation. Your entire workspace affects ergonomics:
Monitor positioning:
- Top of screen at or slightly below eye level
- 20-28 inches from your eyes
- Directly in front (no neck twisting)
Chair setup:
- Feet flat on floor or footrest
- Thighs parallel to ground
- Lower back supported
- Armrests at desk height (optional)
Mouse placement:
- Next to keyboard, same level
- Within easy reach
- Consider the MX Master 3 for a matching ergonomic setup
MX Keys vs MX Keys Mini: Which is Better for Ergonomics?
Both versions benefit equally from proper elevation, but there are considerations:
MX Keys (Full Size)
Pros:
- Numeric keypad for data entry
- Function keys easily accessible
- More familiar if coming from traditional keyboards
Cons:
- Wider footprint pushes mouse farther right
- Shoulder strain for right-handed mouse users
MX Keys Mini
Pros:
- Compact design reduces mouse reach
- Less desk space required
- Better for smaller desks
- More centered typing position possible
Cons:
- No dedicated numeric keypad
- Adjusted function key access
Ergonomic winner: MX Keys Mini—if you don’t need the numpad, the reduced width keeps your mouse closer and reduces shoulder strain.
Advanced Ergonomic Tips for MX Keys Users
1. Master the Function Keys
The MX Keys has programmable function keys. Set them up to reduce reaching:
- Screenshot shortcuts
- Volume control
- App switching
- Brightness adjustment
2. Use Multi-Device Switching Strategically
Switch between devices using the Easy-Switch buttons to:
- Alternate between computers during breaks
- Vary your posture throughout the day
- Reduce repetitive strain
3. Leverage the Backlight
Set the proximity sensor to activate the backlight:
- Reduces eye strain in dim conditions
- Helps maintain proper head position
- Prevents neck craning to see keys
4. Clean Regularly
Dust and debris affect key feel:
- Changes required force
- Alters tactile feedback
- Can lead to compensation movements
- Keep it clean for consistent ergonomics
Common MX Keysetup Mistakes
❌ Mistake #1: Using the Fold-Out Feet
Those little flip-out feet on the back? They make ergonomics worse! They create a positive slope that increases wrist extension—exactly what you’re trying to avoid.
Solution: Keep those feet flat. Elevate the front instead.
❌ Mistake #2: Wrist Rest Misuse
Wrist rests are for resting between typing sessions, not active support while typing.
Correct usage:
- Hands should float while typing
- Rest wrists only during pauses
- The rest keeps wrists neutral when not typing
❌ Mistake #3: Typing Too Far Forward
Sitting at the edge of your desk with the keyboard too far away:
- Causes shoulder strain
- Forces awkward arm position
- Increases wrist extension
Solution: Keyboard close enough that arms are relaxed at sides
❌ Mistake #4: Ignoring Early Warning Signs
Mild discomfort is your body’s early warning system:
- Occasional wrist tiredness
- Slight finger numbness
- Morning stiffness
Take action immediately—chronic pain is much harder to reverse.
The 30-Day Ergonomic Challenge
Want to see real results? Try this:
Week 1: Set up proper elevation and positioning Week 2: Focus on typing with neutral wrists Week 3: Add regular stretching breaks Week 4: Evaluate pain levels and productivity
Most users report:
- 40-60% reduction in wrist discomfort
- Increased typing endurance
- Better focus (pain is distracting!)
- Improved typing speed
Real Results from MX Keys Users
“I loved my MX Keys but was ready to sell it due to wrist pain. Setting it up properly with the right angle completely changed everything. Now it’s my forever keyboard.” - Alex T., Graphic Designer
“As a software engineer, I type 8-10 hours daily. The MX Keys with proper ergonomic setup lets me code all day without the burning wrist pain I used to get.” - Chen W., Senior Developer
Your Next Steps
- Evaluate your current setup - Is your MX Keys flat on your desk?
- Get the right tools - A precision stand designed for MX Keys
- Position everything correctly - Use this guide as a checklist
- Give it time - Your body needs 1-2 weeks to adjust
- Stay consistent - Ergonomics work when you stick with them
The Logitech MX Keys is an incredible keyboard. With proper ergonomic setup, it becomes the foundation of a pain-free, productive workspace that supports your health and career for years to come.
Ready to optimize your MX Keys? Get your KeyRiser for check Amazon for current price (normally $12.99) →
Related: Why Keyboard Ergonomics Matter | support a more neutral typing setup
Frequently Asked Questions
Q: Why does my MX Keys cause wrist pain even though it’s a premium keyboard?
A: The MX Keys is an excellent keyboard, but it sits flat by default, which forces your wrists into extension. Proper elevation solves this issue and transforms the ergonomics.
Q: What’s the best angle for the MX Keys?
A: Ergonomic research consistently shows that elevating the front of your keyboard (negative tilt) is optimal. This keeps your wrists in a neutral position and significantly reduces strain.
Q: Do I need a special stand for the MX Keys?
A: A precision-engineered stand designed for the MX Keys ensures the optimal angle and stable positioning. Generic stands may not provide the correct elevation or fit properly.
Q: How much does proper MX Keys ergonomic setup cost?
A: A precision keyboard stand costs check Amazon for current price (normally $12.99) and is the most cost-effective ergonomic upgrade you can make for your MX Keys.
Q: Will elevating my MX Keys affect its functionality?
A: No, elevation only improves ergonomics. All functionality remains the same—multi-device switching, backlighting, and typing experience all work perfectly.
Q: How long does it take to adjust to the new angle?
A: Most users adjust within 1-2 weeks. Your body needs time to adapt to the new wrist position, but the benefits are immediate.
Ready for a Better Typing Angle?
Check KeyRiser on Amazon and confirm compatibility with your MX Keys model.
Buy Now - Check Amazon